Whether you’re designing a poster, drafting up legal documents, or creating anything with written content using Affinity Publisher, there’s nothing more frustrating and embarrassing when you notice a sneaky typo only after you’ve sent your work to its intended destination.
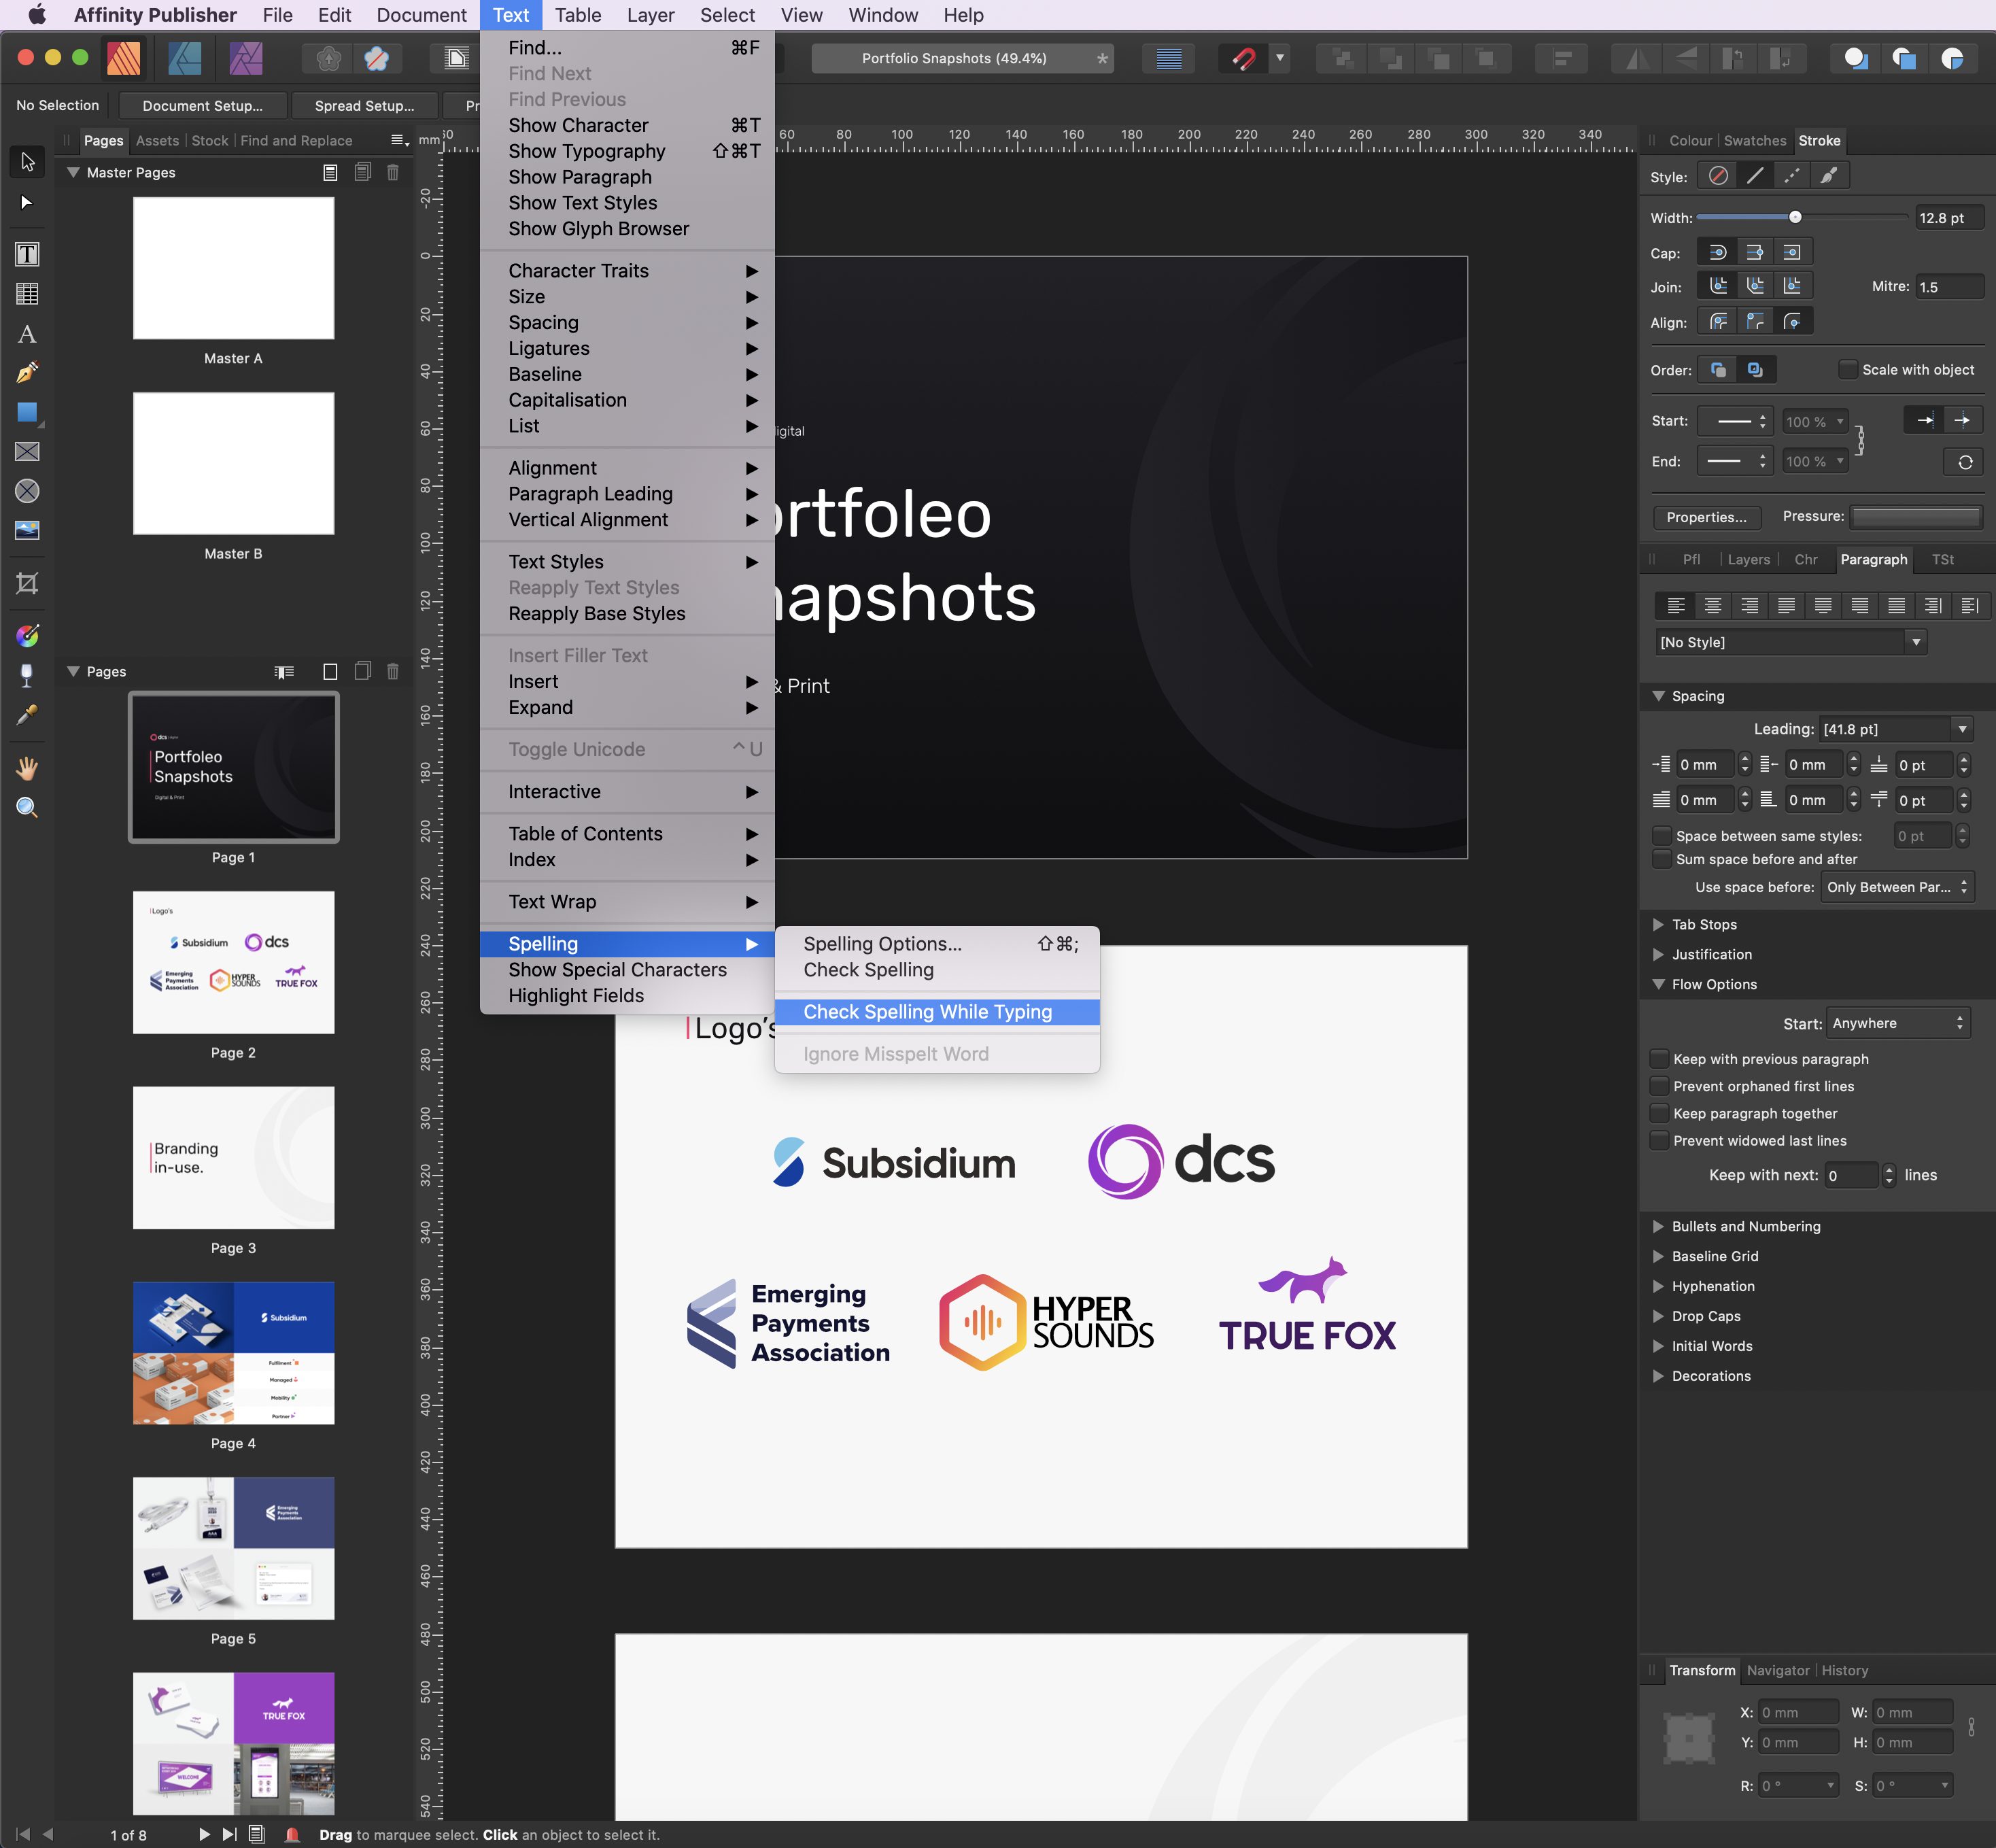
Fortunately, you can avoid this as Affinity Publisher has a built-in spell-checker. If you are new to the Affinity suite, you may be unaware that this feature is not automatically enabled. To enable it, you need to select the ‘Check Spelling While Typing’ option which can be found within the ‘Spelling’ menu, located under the ‘Text’ tab at the top of your screen.
Step 1: Enable ‘Check Spelling While Typing’
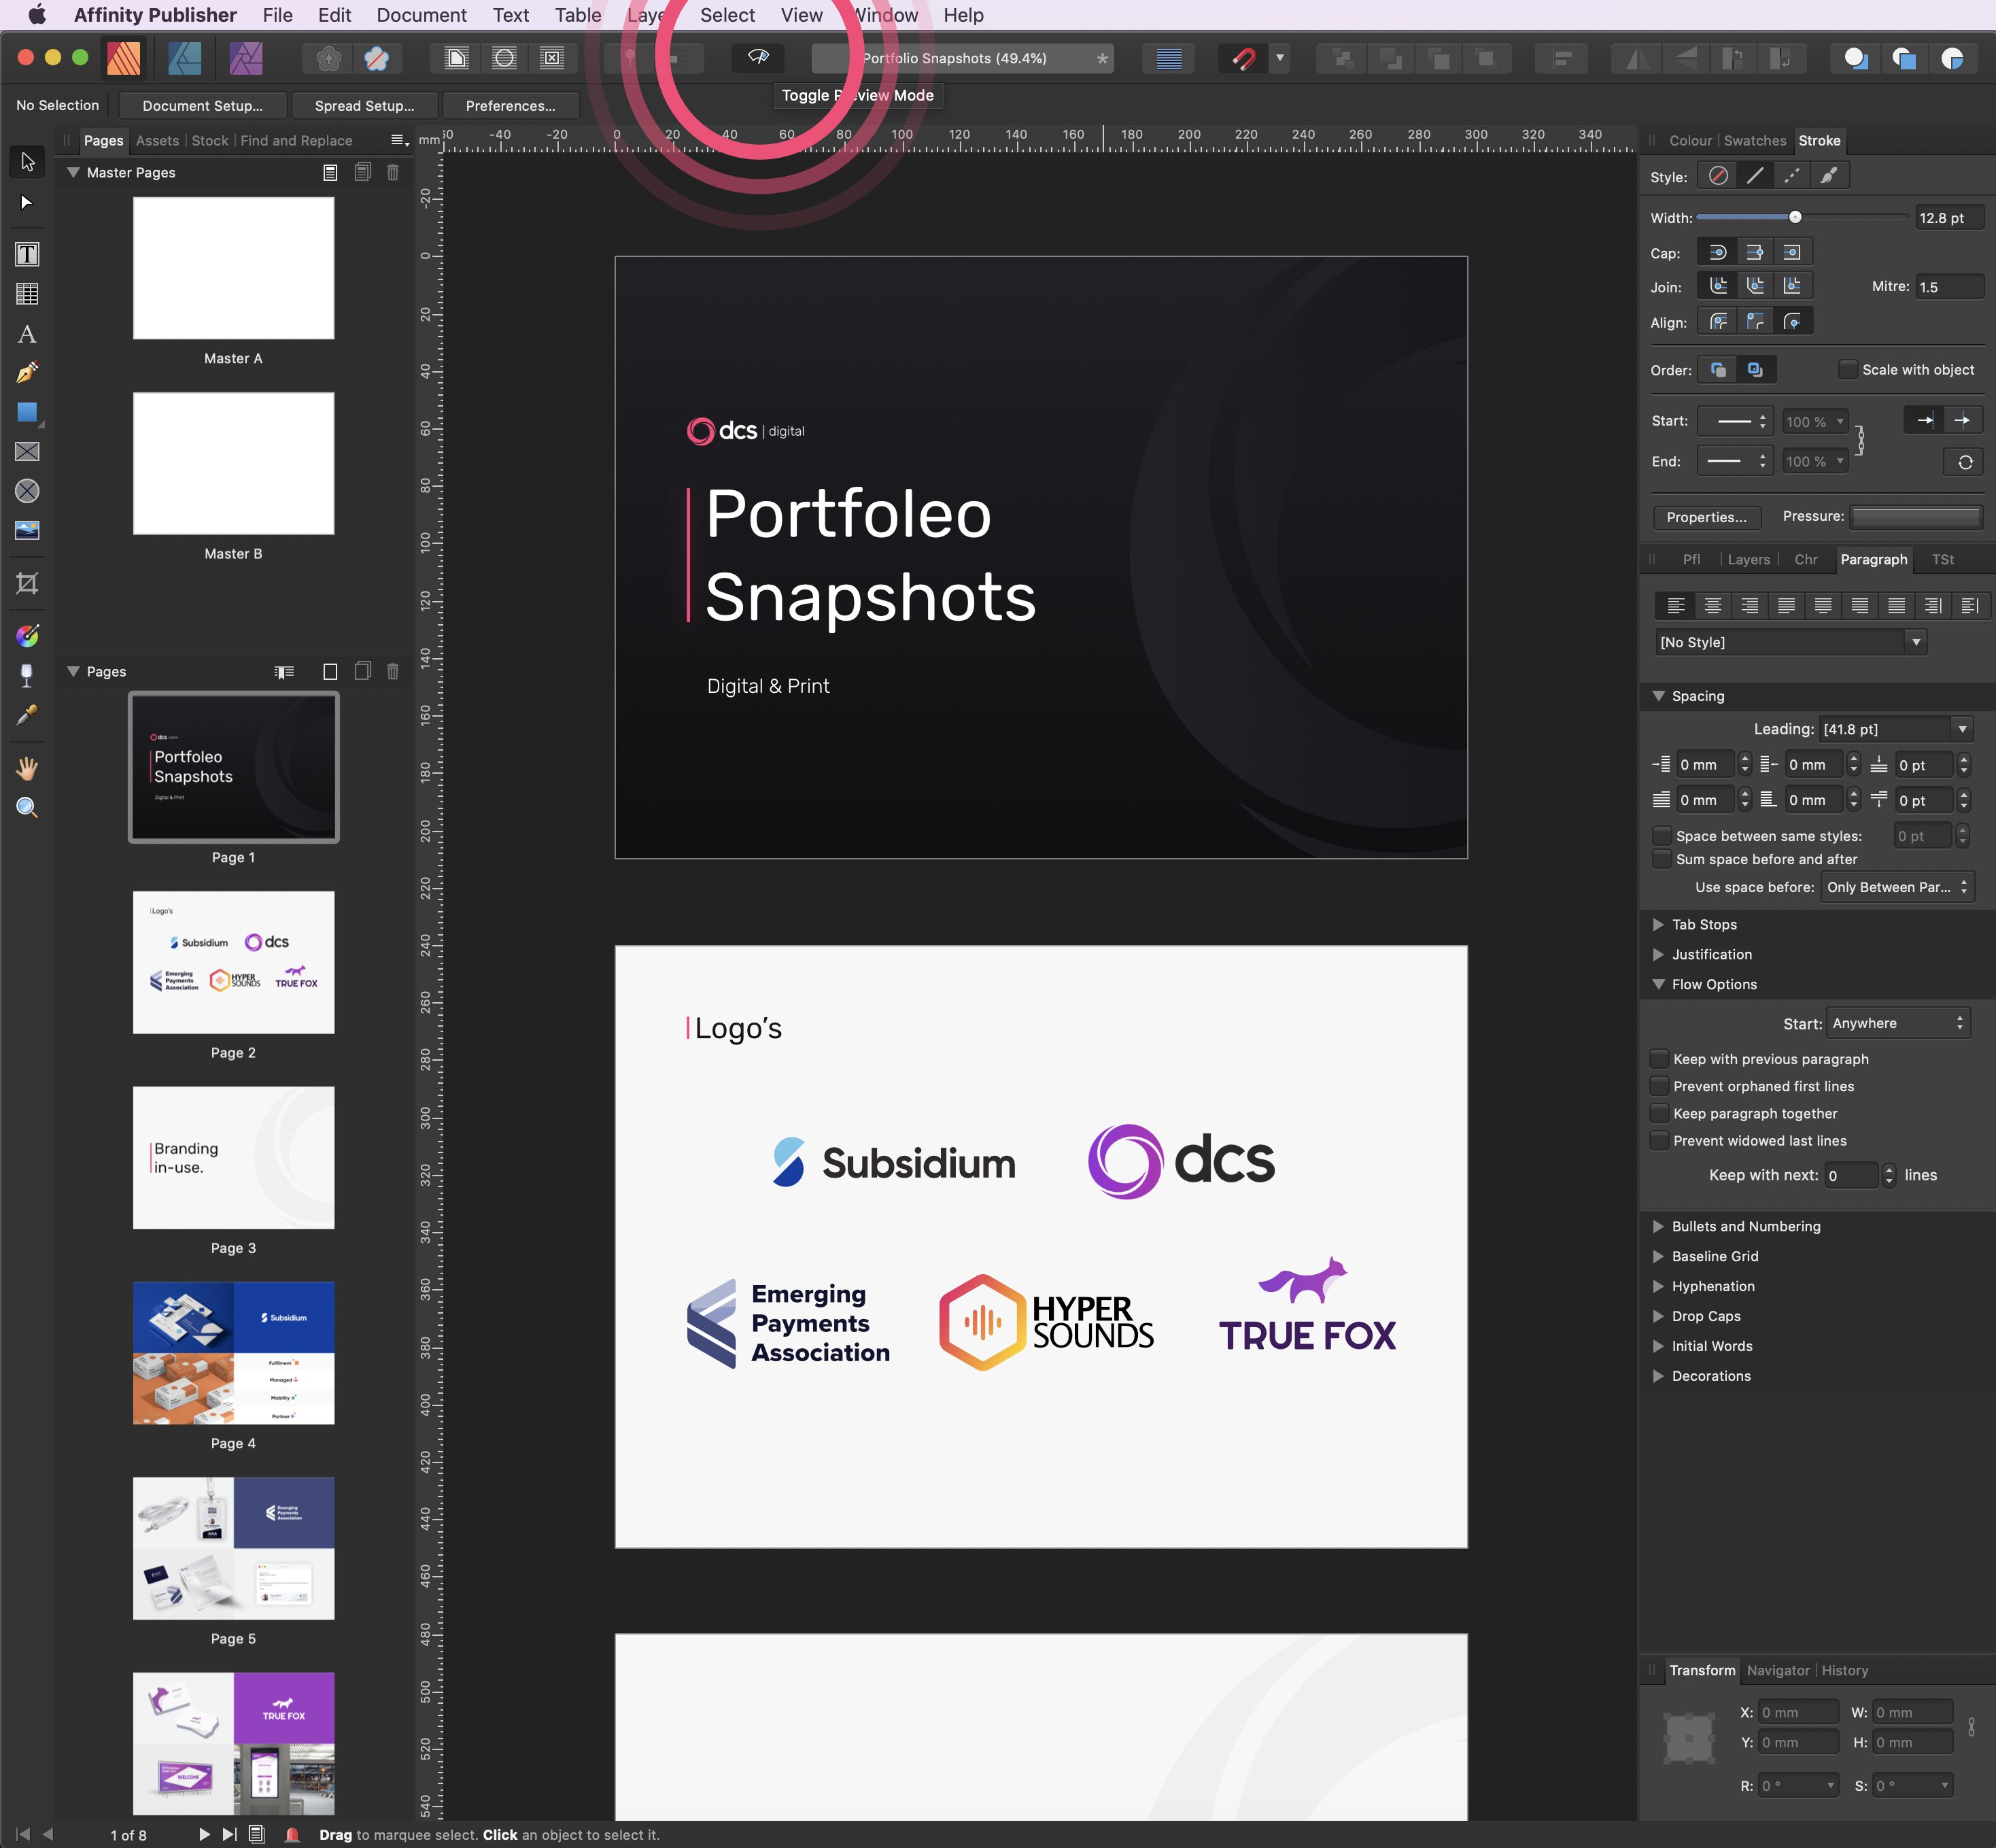
Step 2: Toggle Preview Mode
To make misspelled words visible (a red wiggly line appears underneath the word in question), you need to be in the working mode on your document – this is the mode where your margins, guides, grids and ‘hidden’ characters will also be visible. To toggle between working mode and preview mode, you can simply click the toggle button which is located in the horizontal toolbar at the top of your window (it looks a bit like a windscreen wiper).
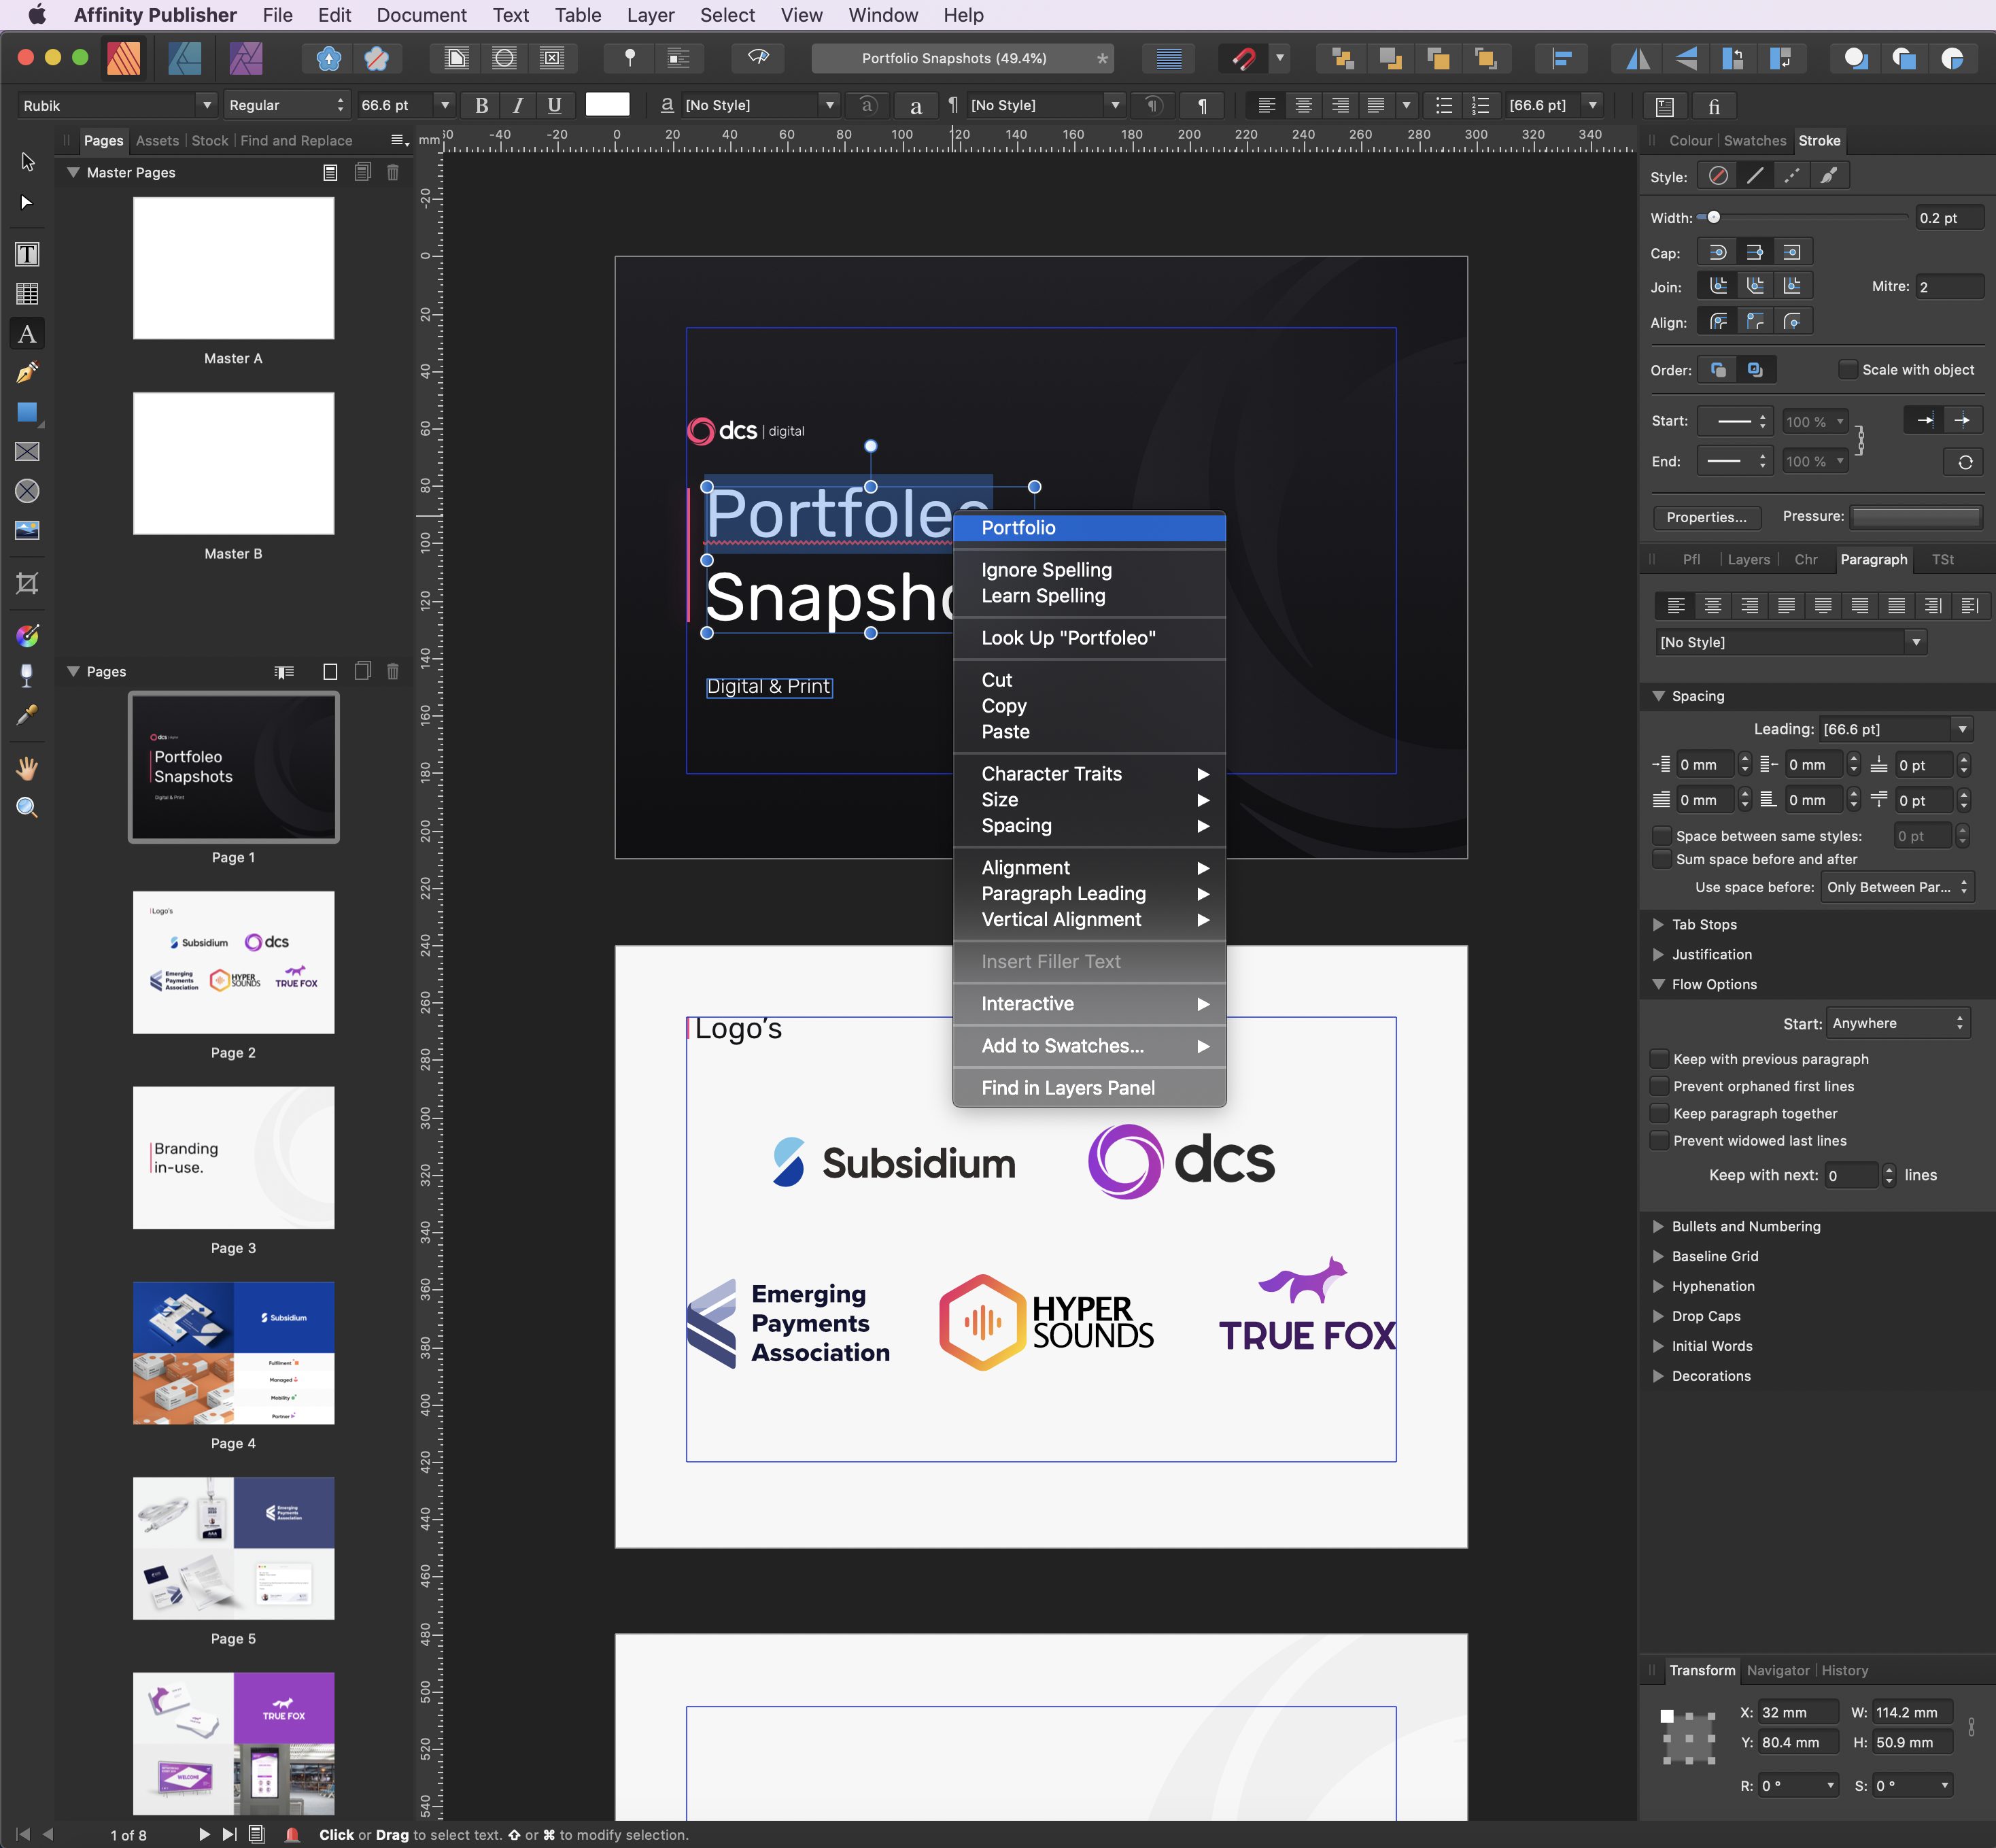
Step 3: Replace, Ignore or Learn Spelling
Once you’ve located any misspelled words, you can right click on each word and Affinity will suggest a correction or alternative, which you can select and the word will be replaced. If you have a word, such as a name, that is marked as incorrect when it isn’t, you can ask Affinity to ‘Learn spelling’ or ‘Ignore spelling’.